
Navigating an airport can be a complex and often overwhelming experience, especially if you are flying alone for the first time. With multiple steps and numerous procedures to follow, it’s easy to feel lost. Fear no more, as this comprehensive guide will show you how to navigate an airport and how to board a plane without any hassle, either for flying domestically or internationally. Let’s dive in!
1. Pre-Departure Preparation
Research Your Airport and Airline
Before your trip, spend some time researching the airport you’ll be flying from. Visit the airport’s website to familiarize yourself with its layout, amenities, and transportation options. Major airports like JFK in New York, LAX in Los Angeles, and LHR in London have detailed maps and guides available online, which can be very helpful.
Additionally, review your airline’s policies regarding baggage, check-in procedures, and in-flight services to avoid any surprises.
Packing Strategically
Packing strategically is essential for a smooth travel experience. First, decide on the baggage you’ll be taking. You may take only a carry-on if you want to travel light, or you could bring a checked bag if you have lots of things to take with you. Nonetheless, the TSA and airlines regulate both types of baggage.
First things first, adhere to TSA carry-on rules to know exactly what to pack in a carry-on and what to leave for the checked baggage. Follow your airline’s baggage allowances to ensure your luggage’s size and weight (carry-on, checked bag, and personal item) correspond to their specific restrictions.
Each airline has its own policy regarding baggage measurements and weights. Naturally, these numbers fluctuate due to each airline’s policy, but standard carry-ons should measure up to 22 x 14 x 9 inches and weigh up to 35 lbs (sometimes as low as 22 lbs).
Pack essential items such as medications, travel documents, a change of clothes, and electronics in your carry-on. This ensures you have what you need if your checked baggage is delayed or lost.
Last but not least, remember the 3-1-1 rule for liquids in carry-on luggage: containers must be 3.4 ounces (100 milliliters) or less, all liquids must fit in a single quart-sized bag, and each passenger is limited to one bag. That is for carry-on baggage.
Read also: The Art of Traveling Solo in Style
Online Check-In
Taking advantage of online check-in can save you time and allow you to choose your seat. This service typically opens 24-48 hours before departure. Once you’ve checked in online, print your boarding pass or download it to your smartphone. Some airlines also offer mobile apps for easy access to your boarding pass and other travel information.
Arangrant can help you check in with its Automatic Check-in service, which, once inquired, allows us to check in on your behalf. By accessing this service, you will get your boarding pass on the provided email at least one day before your departure date.

2. Arriving at the Airport
Timing is Key
Arriving at the airport with plenty of time to spare is crucial. For domestic flights, plan to arrive at least two hours before departure. For international flights, aim for at least three hours. This allows ample time for check-in, security, and customs procedures.
Do you have checked baggage? Consider that the check-in queues are long, and so is the time passing. Do you need to park at the airport? Add at least 20 minutes to your time spent at the airport. Or do you have a TSA Precheck or Global Entry? Then, you might skip those long lines and go directly to the security checkpoint.
Transportation to the Airport
Navigating airport transportation involves selecting the best option based on cost, convenience, and your specific needs. Public transit, including buses, trains, and airport shuttles, offers economical and convenient access to airports. For example, the FlyAway Bus in Los Angeles and Chicago’s Blue Line train to O’Hare are efficient and cost-effective. Airport shuttles like SuperShuttle provide door-to-door service, reducing the hassle of parking.
Driving to the airport provides flexibility and control over your schedule. Long-term parking is ideal for extended trips, offering shuttle services to the terminal, as seen at Atlanta’s Hartsfield-Jackson. Short-term parking is suitable for brief stays, located closer to terminals like at San Francisco International. Valet parking, available at airports such as Dallas/Fort Worth, allows for maximum convenience by letting you drop off your car right at the terminal entrance.
Ride-sharing services like Uber and Lyft provide door-to-door convenience without the need for parking, with designated pick-up zones at many airports like LAX. Traditional taxis, such as New York City’s yellow cabs, are reliable and offer flat-rate fares to major airports like JFK International.
Specialized airport transportation services offer additional options. Private car services, such as Blacklane, provide luxury, personalized transportation with professional drivers. Hotel shuttles, like those from the Hyatt Regency at Orlando International, offer complimentary and convenient rides to the airport, ideal for hotel guests.

3. What to Do at the Airport Step-by-Step
1. Head to the Airport Check-In Counter
If you haven’t checked in online, don’t worry; we’ll show you how to check in at airport and avoid the hassle. The first thing you need to do is proceed to your airline’s check-in counter. Have your identification (ID or passport), confirmation number, or frequent flyer card ready to present it to the airport staff. By the way, many airports also have self-service kiosks where you can check in, print your boarding pass, and tag your bags, often quicker than waiting in line at the counter.
If you’ve already checked in online, head straight to the baggage drop counter if you have checked baggage or to the security point if you have only a carry-on. Ensure your bags are tagged correctly, and keep the baggage receipt for reference.
2. Go to the Security Screening
Here’s all the needed information about the security screening process at the airport:
General Security Screening Process
- Document Check: Have your boarding pass and identification (passport for international flights or a government-issued ID for domestic flights) ready for inspection by the TSA officer. The officer will verify your identity and match your boarding pass details with your ID.
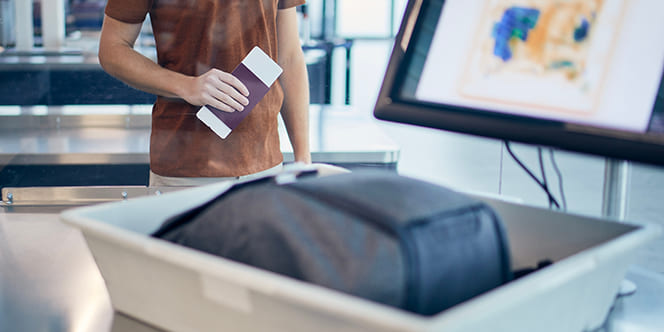
- Preparation for Screening: Before reaching the conveyor belt, remove your shoes, belt, jacket, and any items containing metal (e.g., coins, keys, watches). Take out laptops, tablets, and other large electronics from your bag. Place them in a separate bin. Place your quart-sized bag of liquids and gels (containers must be 3.4 ounces or less) in a bin.
- Security Scanning: Place your items (carry-on luggage, electronics, shoes, and liquids) on the conveyor belt. Your items will go through an X-ray machine for screening. Pass through a walk-through metal detector or a full-body scanner. Follow the instructions of the TSA officers.
- Additional Screening: If the alarm goes off or you are randomly selected, you may undergo a pat-down screening by a TSA officer of the same gender. Officers may also inspect your belongings by hand or conduct additional tests for explosives.
- Collect Belongings: After passing through the screening, collect your items from the conveyor belt. Ensure you have all your belongings before leaving the area. Put your shoes, belt, and jacket back on and repack your electronics.
TSA PreCheck
With TSA PreCheck, you can use designated lanes that typically have shorter lines and faster processing. You usually do not need to remove your shoes, belt, or light jacket and you can leave laptops and compliant liquids in your carry-on bag. To be eligible, you must apply for TSA PreCheck, undergo a background check, and be approved. The service is available for a fee and lasts for five years.
Additional Tips for Smooth Screening
- Arrive at the airport at least 2 hours before a domestic flight and 3 hours before an international flight.
- Ensure all liquids and gels are in a quart-sized bag and that no prohibited items are in your carry-on.
- Check the TSA website or app for any updates on security procedures and prohibited items.
- Listen to TSA officers and follow their instructions to ensure a smooth and efficient screening process.
By being prepared and understanding the security screening process, you can help ensure a more efficient and stress-free experience at the airport.
3. Navigate the Terminal
Once through security, your next step is to check the flight information display screens (FIDS) to confirm your gate number and flight status. This will ensure you’re aware of any changes, such as a gate reassignment or a delay.
Follow the signs directing you to your gate. As you make your way, take the opportunity to explore the terminal. Airports often feature a variety of shops, restaurants, and services that can enhance your travel experience. For instance, you might find duty-free shops offering discounted perfumes and electronics or specialty stores perfect for picking up last-minute travel essentials and souvenirs.
Dining options in airports can range from quick-service cafes to sit-down restaurants. You could grab a coffee at Starbucks, enjoy a meal at Chili’s, or pick up a snack from a convenience store. Additionally, many airports offer useful services such as currency exchange, ATMs, and even spas or lounges where you can relax before your flight.
Don’t forget to take advantage of the free Wi-Fi that many airports provide. This allows you to check emails, browse the web, work, or keep up with flight updates. You can connect to the airport’s Wi-Fi network and use the time to stream a movie, catch up on social media, or even work.
4. Waiting for Your Flight
Comfort and Convenience
While waiting for your flight, consider purchasing a day pass or using your frequent flyer status to access airport lounges. Lounges offer comfortable seating, complimentary food and beverages, Wi-Fi, and sometimes even showers, providing a relaxing environment away from the bustling terminal.
Locate charging stations to keep your devices powered, often found near seating areas and gates. Bring a book, download movies, or listen to music to pass the time. Airports also have various retail shops where you can buy magazines, snacks, and souvenirs.
Boarding Process
Pay attention to announcements regarding your flight. Airlines board passengers in groups based on seat location, frequent flyer status, or ticket class. Listen for your group number and have your boarding pass and passport ready. Ensure your carry-on fits the airline’s size requirements and stow any prohibited items.

5. On the Plane
Storing Luggage
Once on board, place larger carry-ons in the overhead bins, ensuring the bin closes easily and your bag is secure. Store smaller items under the seat in front of you, which is ideal for personal items like a purse, laptop bag, or backpack.
In-Flight Experience
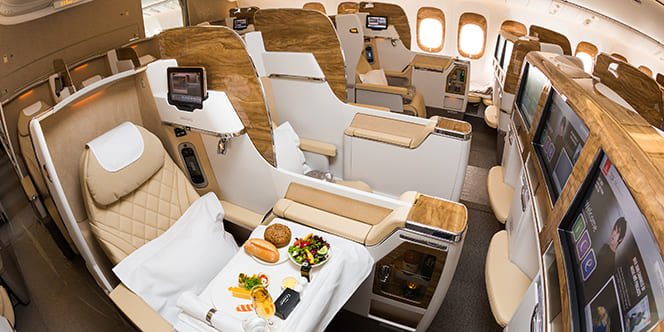
During the flight, pay attention to the safety briefing given by the flight attendants. Familiarize yourself with the location of emergency exits and life vests. Stay hydrated by drinking water, and adjust the air vent above your seat to control your comfort.
On long flights, get up and walk around periodically to stretch your legs. Many airlines offer in-flight entertainment systems with movies, TV shows, music, and games. Bring headphones and a charger for your devices. Some flights also offer Wi-Fi for an additional fee.
In-Flight Services
Depending on the length and class of your flight, you may receive complimentary meals and snacks. On shorter flights, snacks and beverages are usually available for purchase. If you have dietary restrictions or special needs, inform the airline beforehand. Most airlines accommodate requests for special meals or assistance.
6. Arriving at Your Destination
Disembarkation
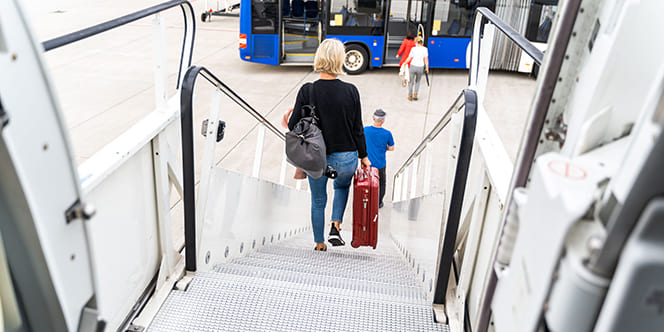
When the plane lands, stay seated until it has come to a complete stop and the seatbelt sign is turned off. Disembark row by row, and if you have a connecting flight, follow the signs to your next gate. Allow plenty of time for any additional security checks or terminal changes.
Baggage Claim
At baggage claim, check the flight information screens for your carousel number. Identify your bags by unique tags or ribbons you placed on them. If your bags do not arrive, proceed to the airline’s baggage service office to file a report. Keep your baggage claim tags until you retrieve your bags.
Customs and Immigration (International Flights)
For international flights, have your passport and any completed customs forms ready. Declare any items you are bringing into the country as required and follow the instructions of the customs officers. Be prepared for possible secondary screening or questions, and stay calm and answer truthfully.
Final Tips on How to Navigate an Airport
Stay Organized
Using a travel wallet can help you keep all your documents, tickets, and essential items in one place. Keep a copy of your itinerary with important details like hotel addresses, contact numbers, and transportation arrangements.
Plan for the Unexpected
Flight delays and cancellations can happen, so have a plan in place. Know your airline’s policy on rebooking and compensation. Carry hand sanitizer, wear a mask if required, and follow health guidelines to protect yourself and others.
Enjoy the Journey
Traveling can be stressful, but staying positive and prepared can make the experience enjoyable. Explore the airport’s unique attractions, such as art exhibits, gardens, or even yoga rooms. Take advantage of these amenities to enhance your travel experience.
Understanding each step of the airport process described in this comprehensive guide from Arangrant allows you to travel confidently and easily. Preparation is key, so give yourself plenty of time, stay organized, and remain calm. Bon voyage and safe travels!